Advanced Custom Fields (ACF) is a powerful plugin that lets you create custom fields without coding. In this guide, you’ll learn how to create ACF fields and fetch their values dynamically in your WordPress theme.
🛠 Step 1: Install and Activate ACF
To start, install and activate the ACF plugin from your WordPress dashboard:
- Go to Plugins > Add New.
- Search for Advanced Custom Fields.
- Click Install Now and then Activate.

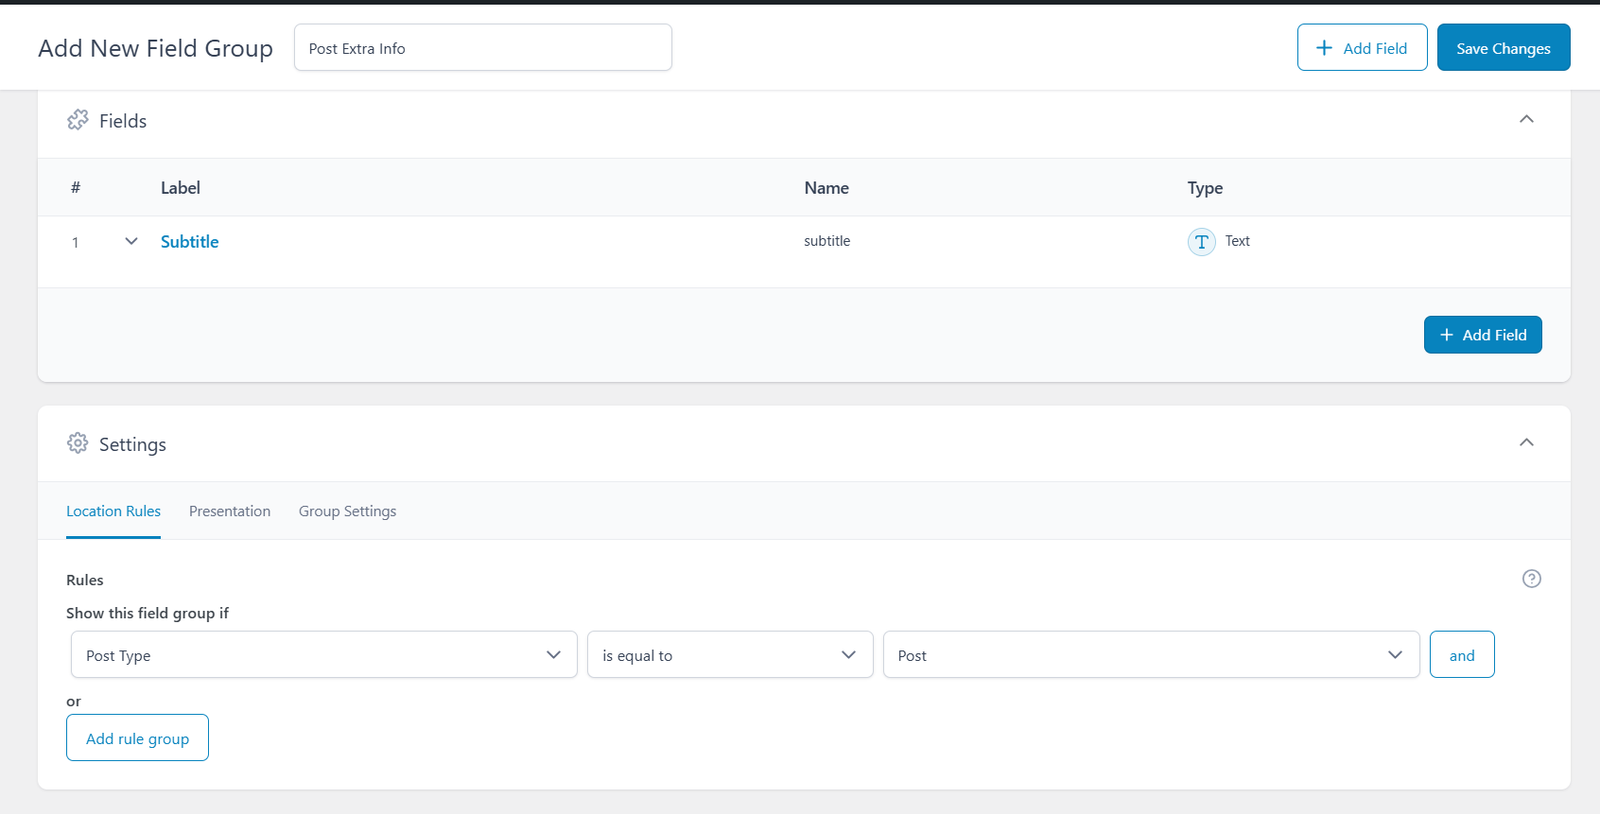
📝 Step 2: Create a Field Group
Next, create a field group and add custom fields like Subtitle or Author Name:
- Go to Custom Fields > Add New.
- Click Add Field and configure:
- Field Label: Subtitle
- Field Name: subtitle
- Field Type: Text
- Set Location Rules (e.g., Post Type = Post).
- Click Publish.
💻 Step 3: Display ACF Field in Theme
Add this code to your template (e.g., single.php) to display the field:
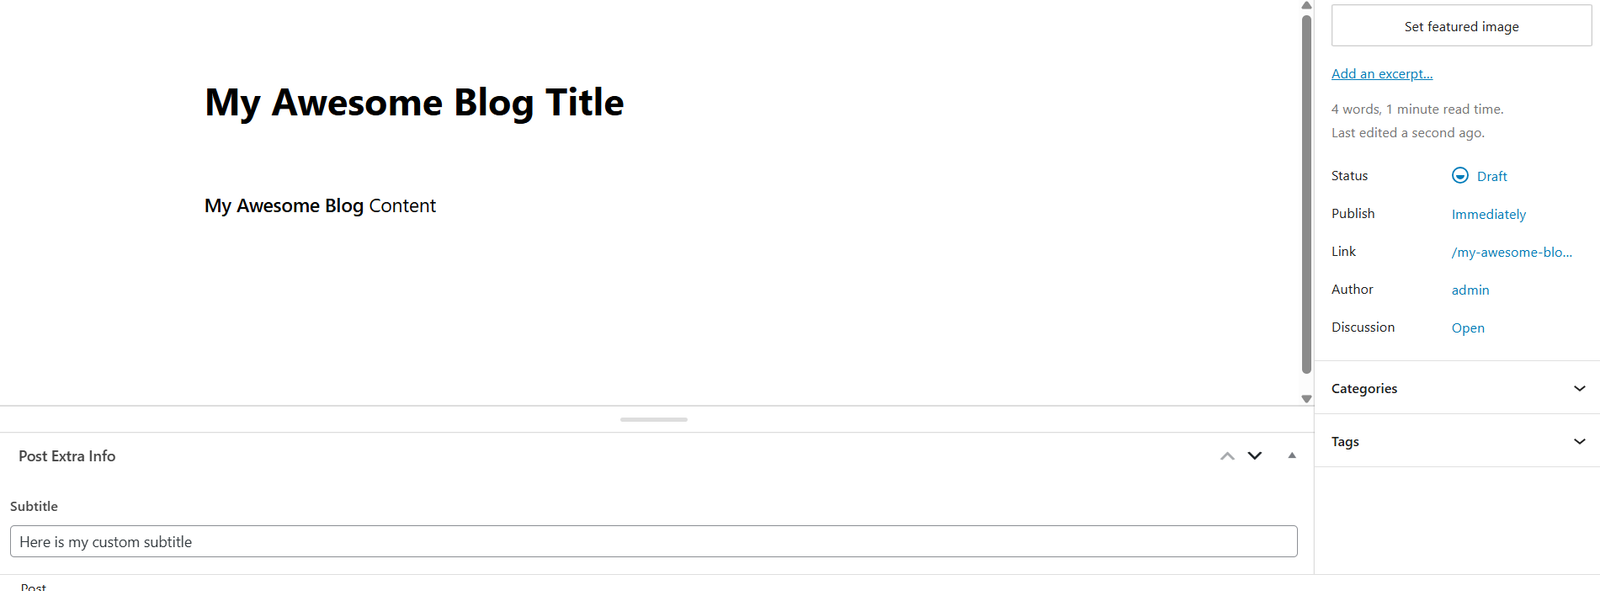
<h1><?php the_title(); ?></h1>
<h3><?php the_field('subtitle'); ?></h3>
<div><?php the_content(); ?></div>

🎯 Step 4: Conditional Display of ACF Field
To show the field only if it has a value:
<?php
$subtitle = get_field('subtitle');
if ( $subtitle ) {
    echo '<h3>' . esc_html( $subtitle ) . '</h3>';
}
?>
📋 Step 5: Fetch ACF for Custom Post Types
To fetch for a specific post ID (like a custom post type):
<?php the_field('subtitle', $post_id); ?>
🔄 Step 6: Use ACF in Loops
Fetch ACF values inside a loop:
<?php if ( have_posts() ) : while ( have_posts() ) : the_post(); ?>
  <h2><?php the_title(); ?></h2>
  <p><?php the_field('subtitle'); ?></p>
<?php endwhile; endif; ?>
🎉 Conclusion
With ACF, adding custom content becomes super easy and flexible. Whether you’re working with posts, pages, or custom post types, ACF makes it seamless to extend WordPress functionality.